PicMonkey - Online Photo Editing for FREE !

Edit your photos online with PicMonkey: resize, crop, adjust exposure, add frames, effects, stickers, texts, overlays, and collages!
PROJECT OBJECTIVE: Use technology to create digital effects on 5 different photos, and arrange all 5 into a picture collage with the PicMonkey software.
Directions
Save photos from Google Images and create 5 different images using the Effects found on the PicMonkey website. Then combine all 5 of them into a Picture Collage using PicMonkey.
Save photos from Google Images and create 5 different images using the Effects found on the PicMonkey website. Then combine all 5 of them into a Picture Collage using PicMonkey.
Step 1
You need to use the Google Chrome web browser for this project.
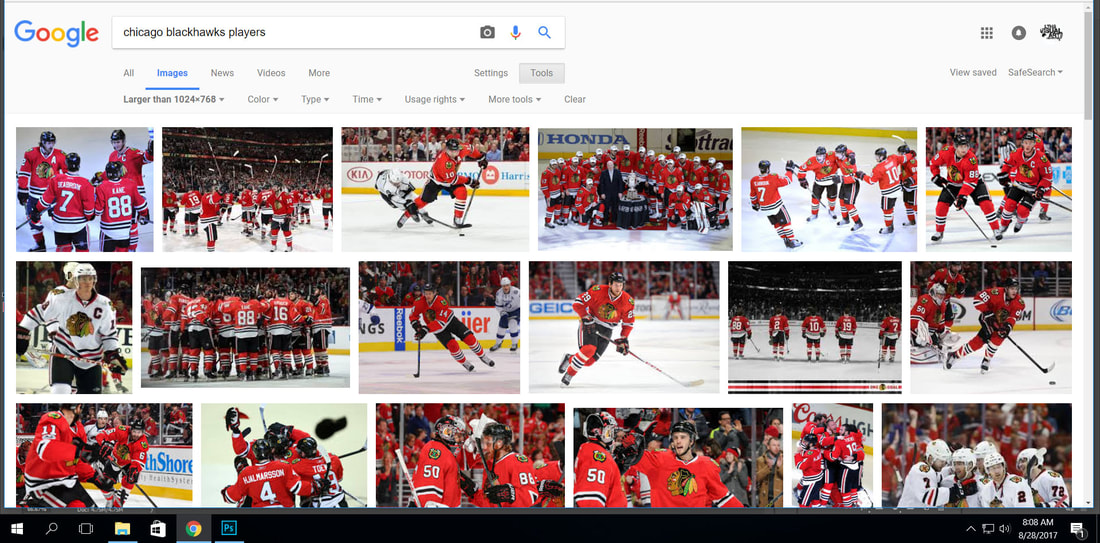
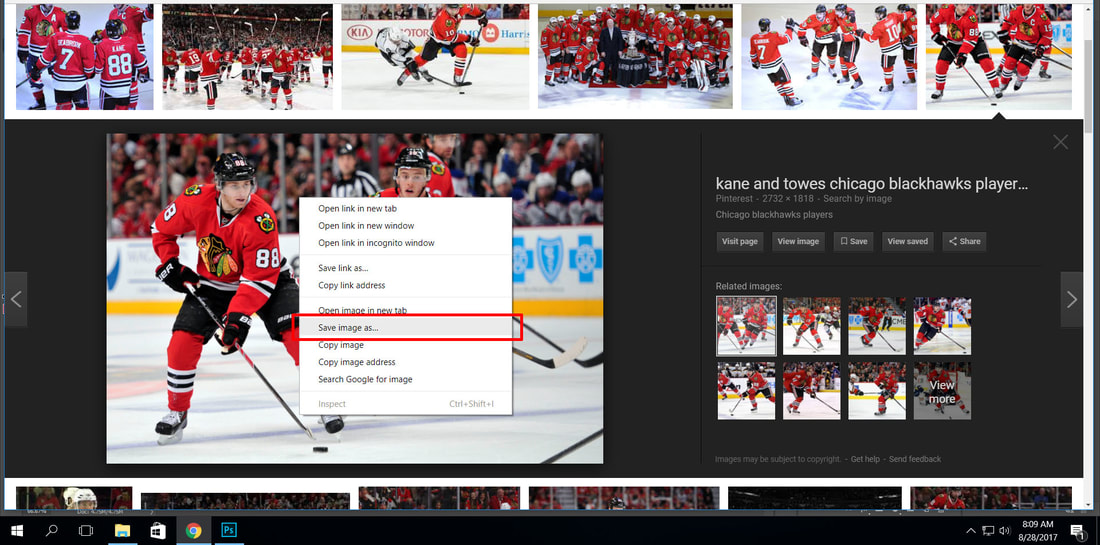
SAVE 5 photos (good quality, large size photos) you want to use before starting to use PicMonkey. Save them to the Downloads folder, or your Google Drive folder.

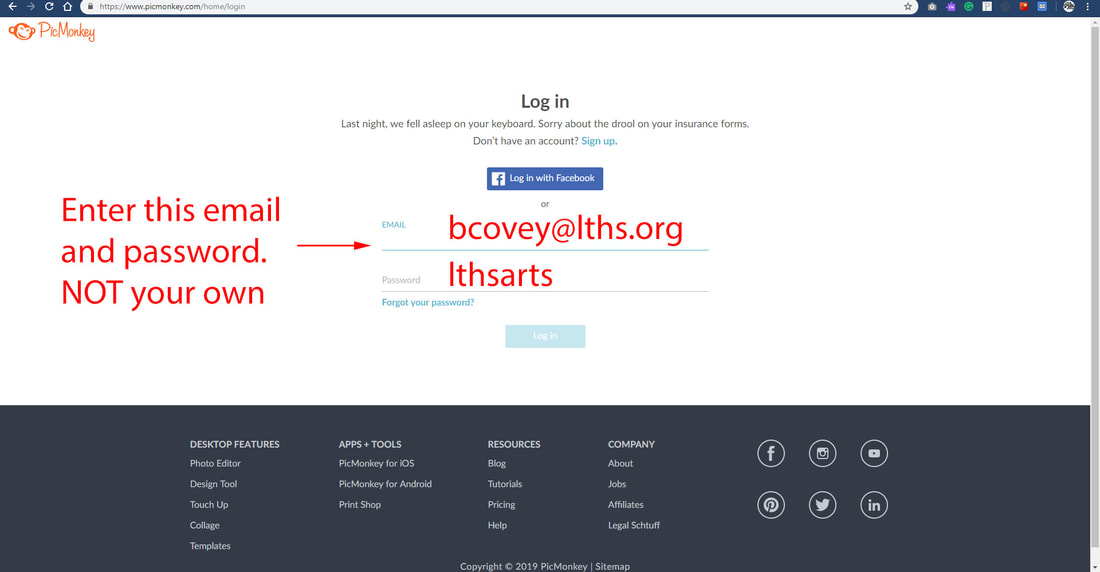
Enter [email protected] for the user name and lthsarts for the password.
DO NOT try and use your own user name
DO NOT try and use your own user name
Step 3
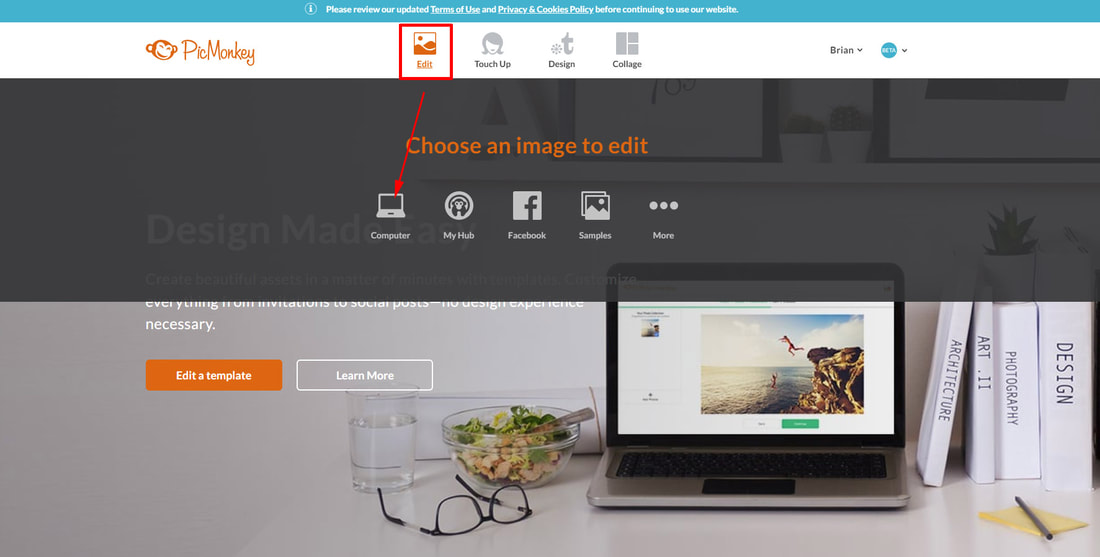
Click on the "Edit" icon, then select one of the photos you saved before you began. These photos might be in your DOWNLOADS folder or your Google Drive folder.
Click on the "Edit" icon, then select one of the photos you saved before you began. These photos might be in your DOWNLOADS folder or your Google Drive folder.

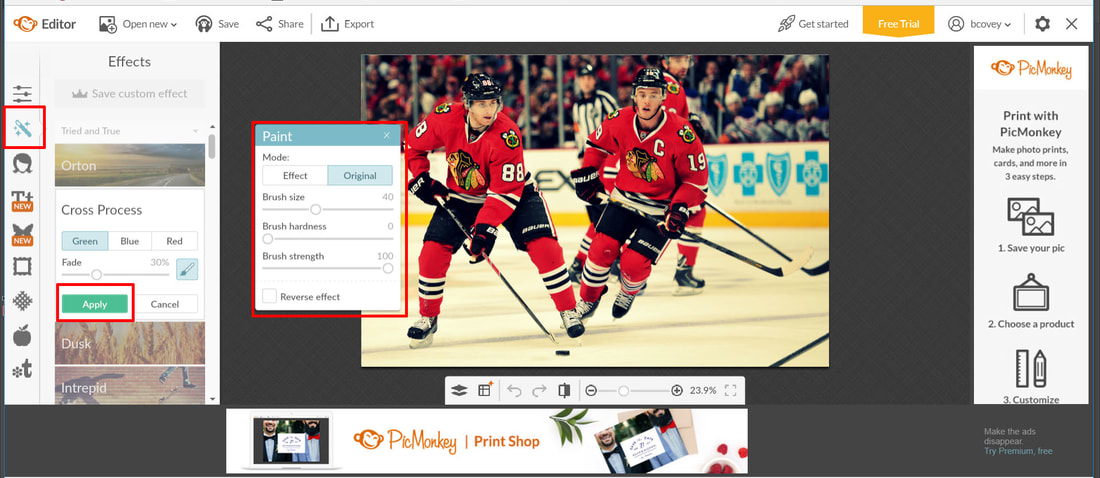
Once you have a photo opened you may make basic edits (the Sliders icon), or apply Effects (the Wand icon), use the touch up feature (the face icon), include text (the Tt icon), put on overlays (symbol icon), select a fun frame, or add a texture.
Step 4
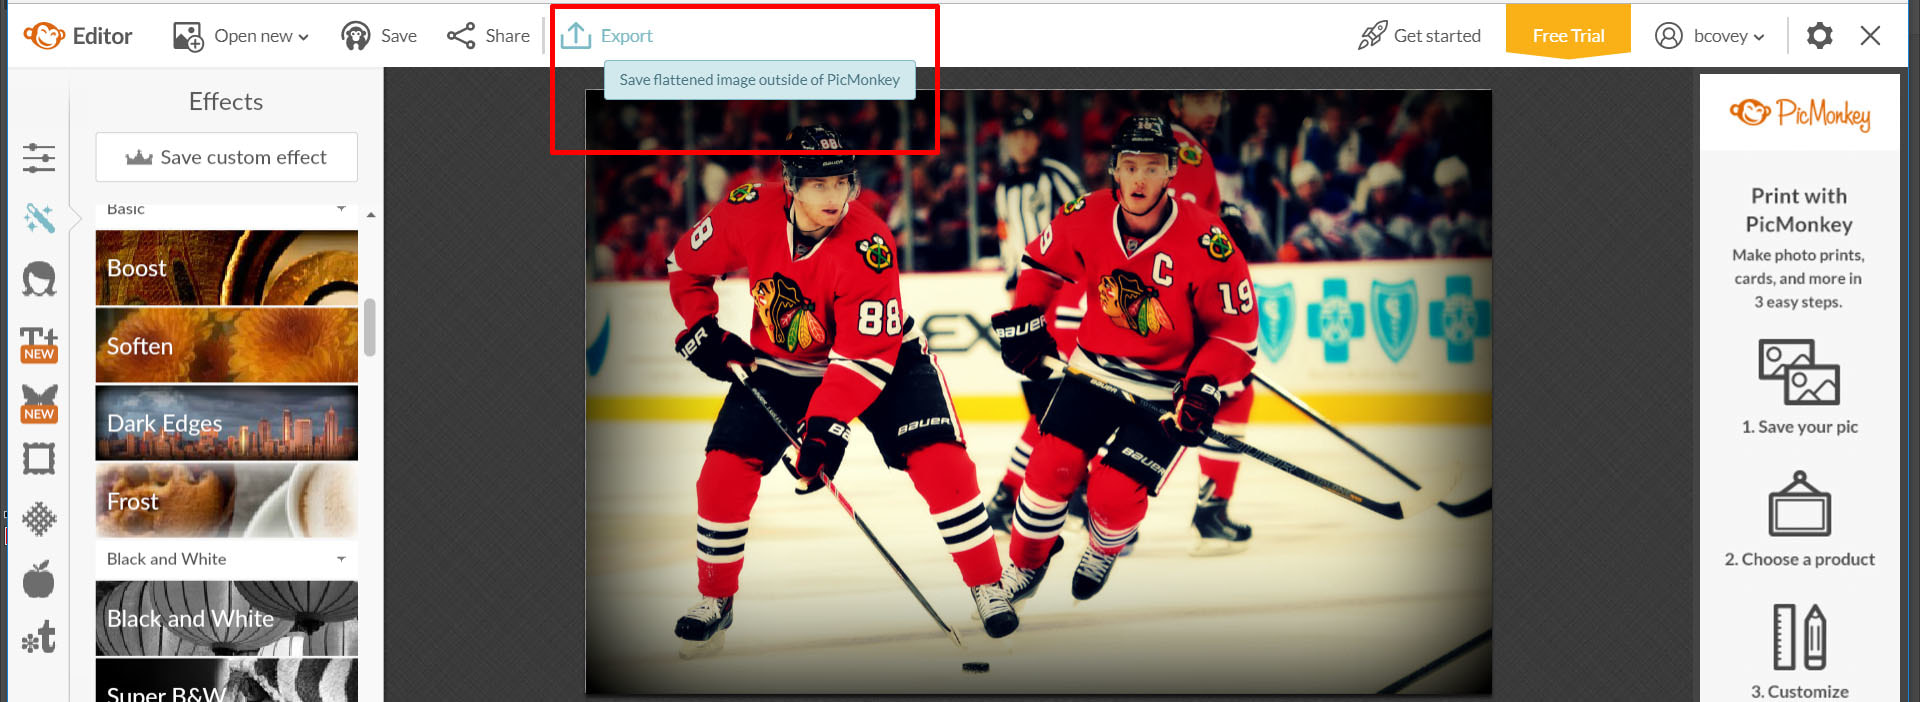
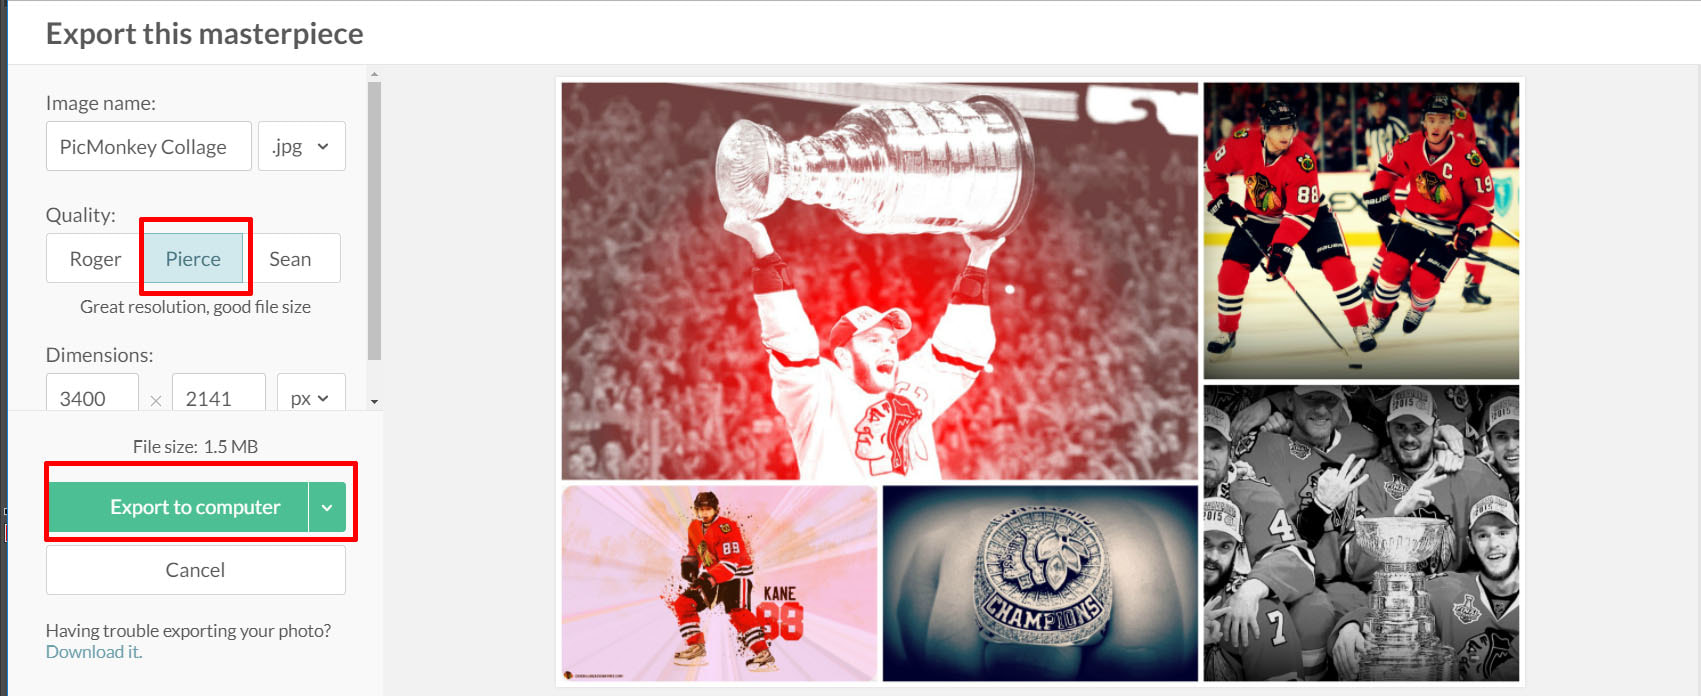
After you've perfected your photo, click "Export" in the top toolbar above the photo, title it :
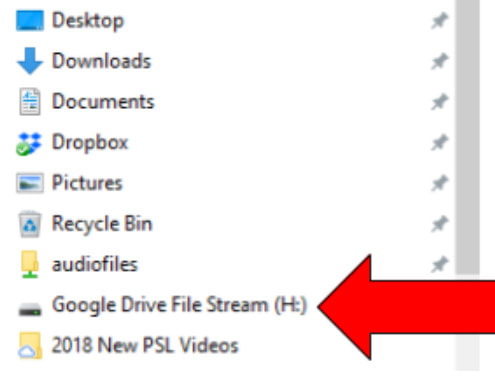
YourLastName_picmonkey_1 to your student folder on your Google Drive File Stream (H:)
After you've perfected your photo, click "Export" in the top toolbar above the photo, title it :
YourLastName_picmonkey_1 to your student folder on your Google Drive File Stream (H:)
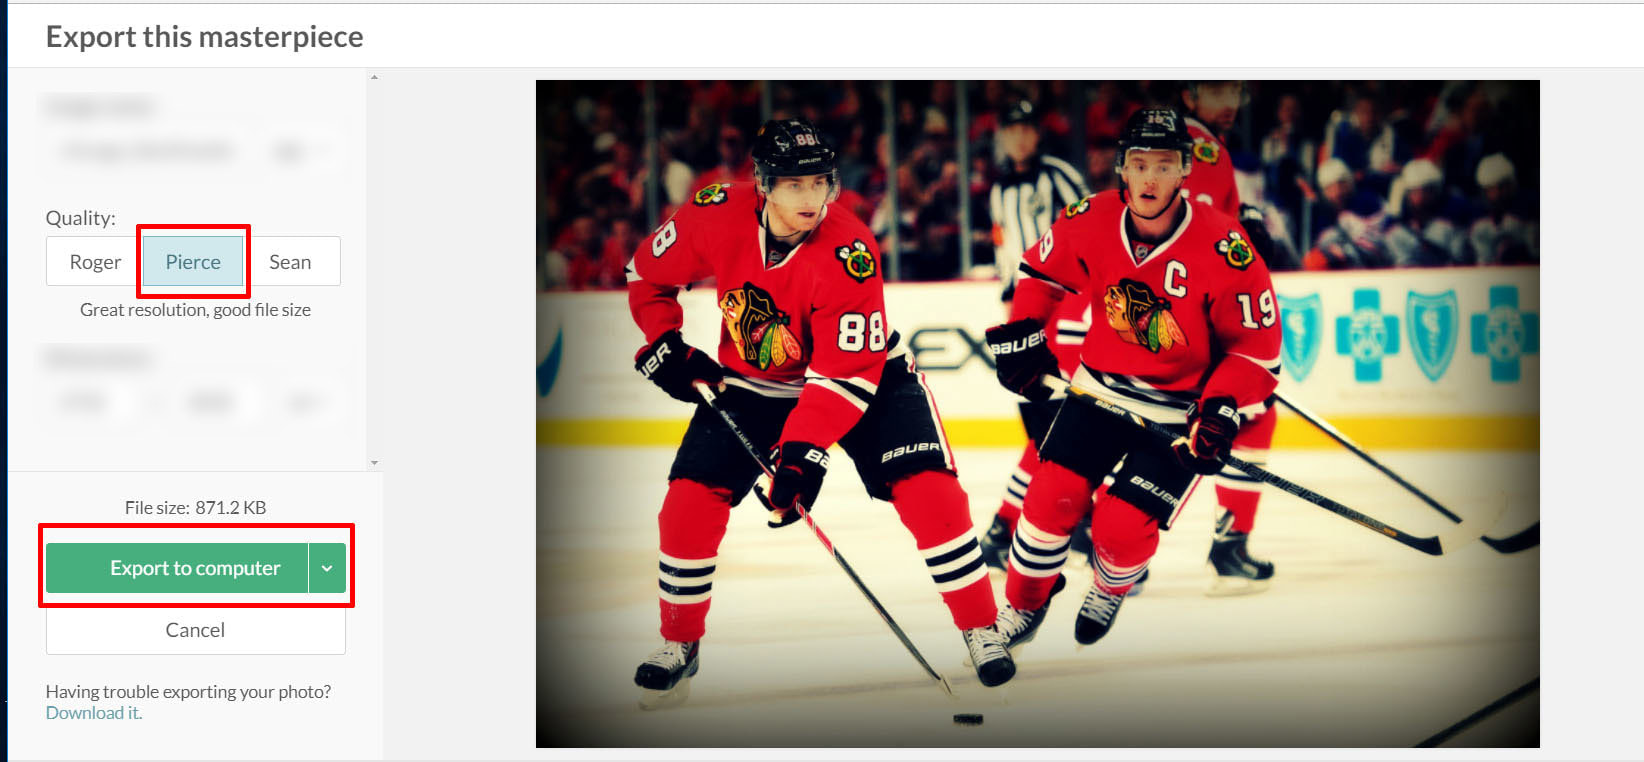
Choose Quality - Pierce
File Size - Export to computer

Step 5
Repeat Steps 3 thru 5 until you have 5 different photos with effects from Picmonkey.
Save ALL your 5 projects to your Google Drive File Stream (H:) (Name & student number) as...
- YourLastName_picmonkey_1
- YourLastName_picmonkey_2
- YourLastName_picmonkey_3
- YourLastName_picmonkey_4
- YourLastName_picmonkey_5
- YourLastName_picmonkey_1
- YourLastName_picmonkey_2
- YourLastName_picmonkey_3
- YourLastName_picmonkey_4
- YourLastName_picmonkey_5

Step 6
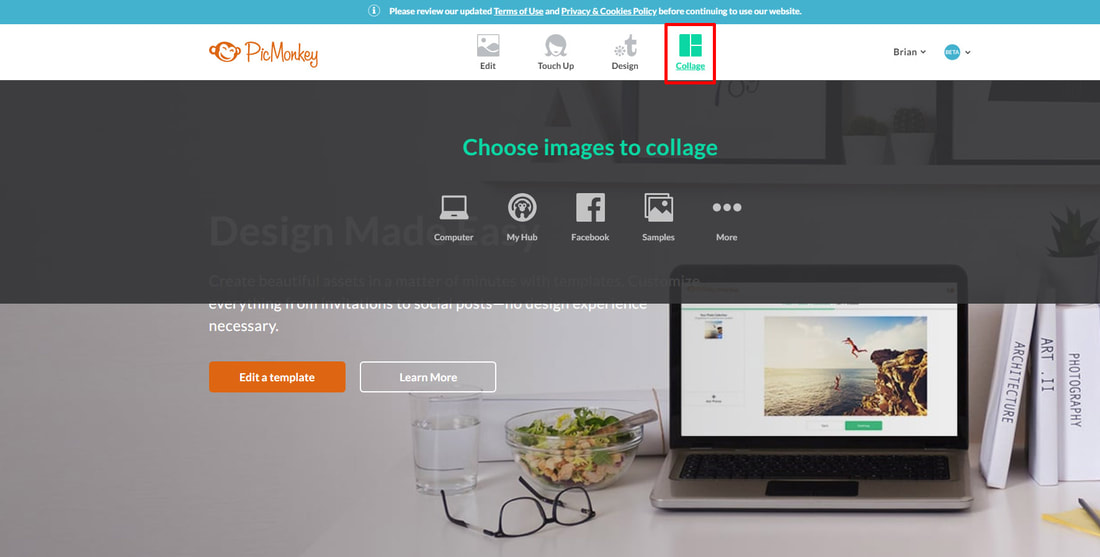
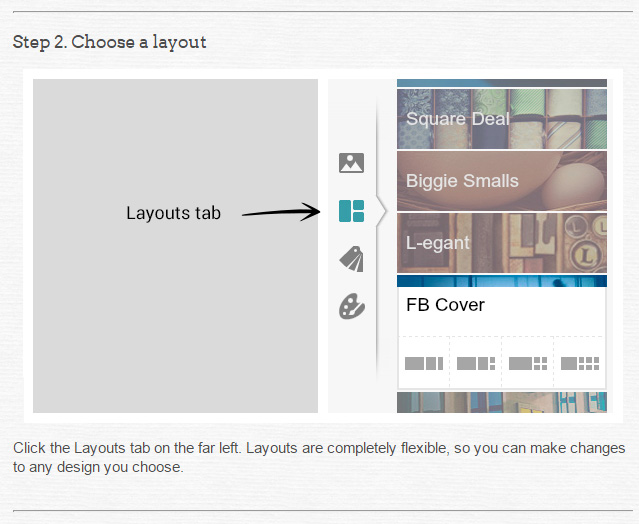
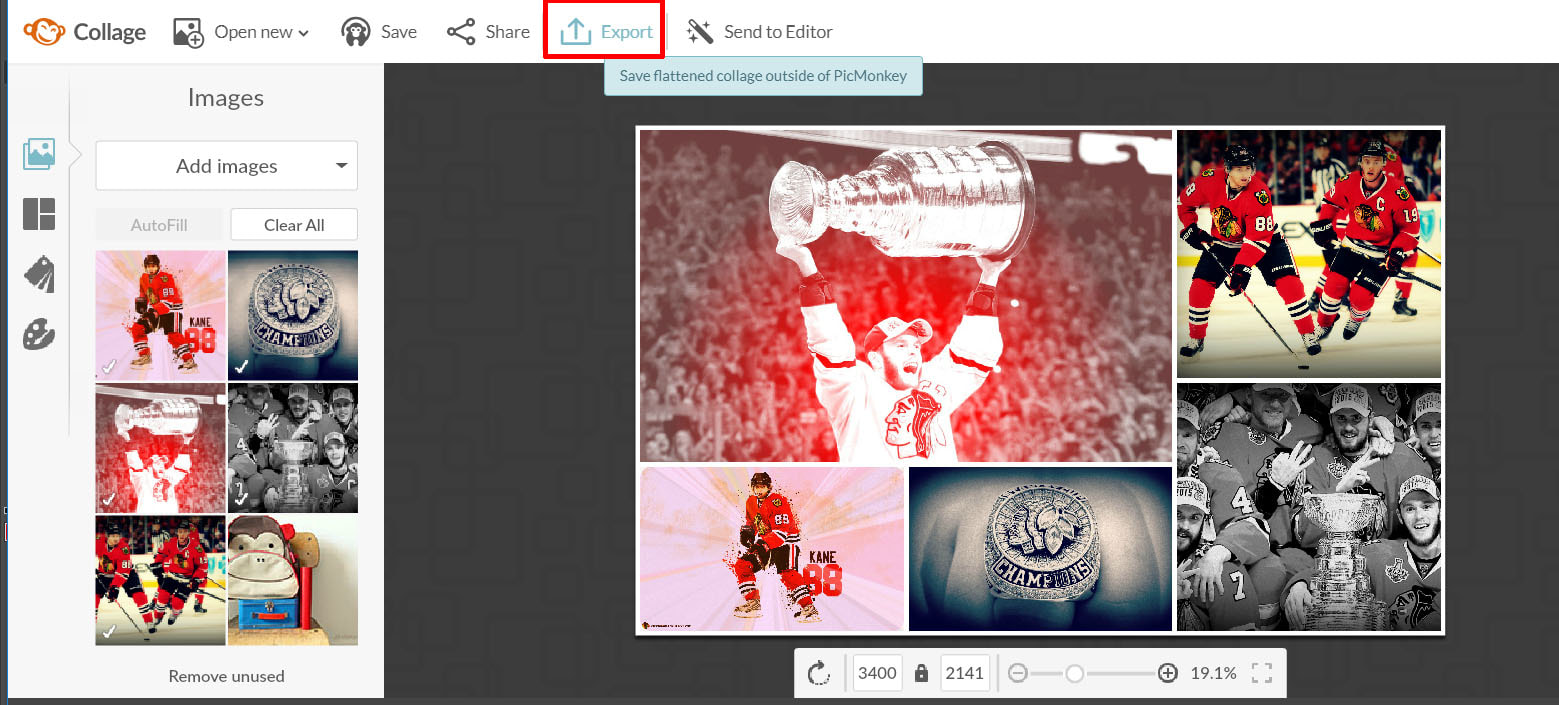
Go back to the main PicMonkey.com and click on the Collage button
www.picmonkey.com/blog/how-to-make-collage
Go back to the main PicMonkey.com and click on the Collage button
www.picmonkey.com/blog/how-to-make-collage
Step 7
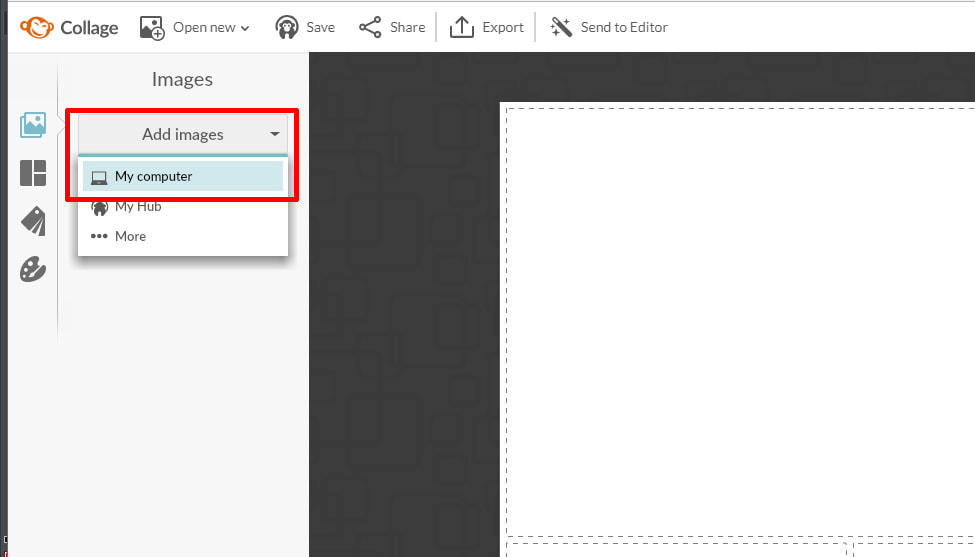
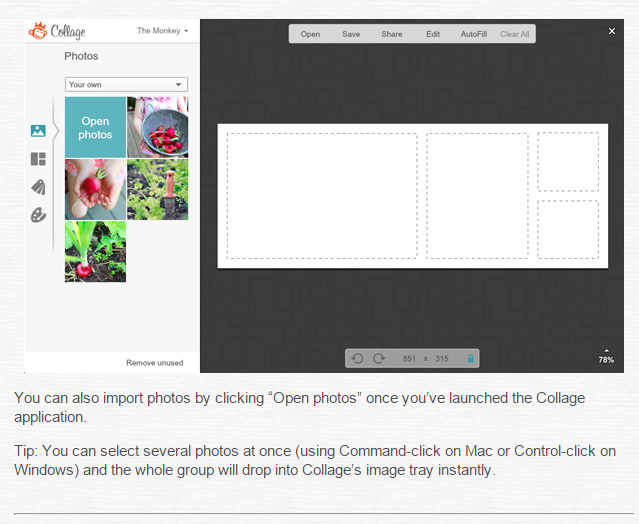
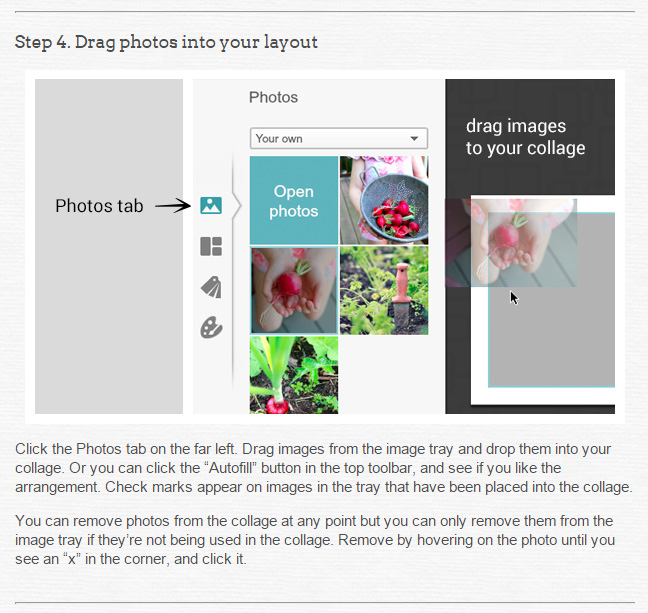
Add your 5 edited Picmonkey photos you just saved.
Click the Add Images button > My Computer
Navigate to your Google Drive File Stream (H:) folder where these should be saved.
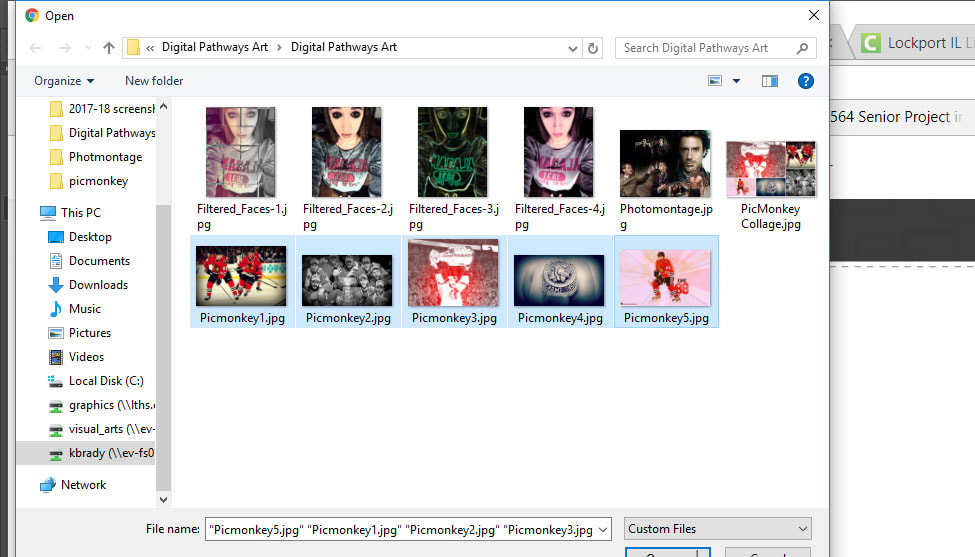
Press the CTRL Button and click on each one. Then click Open
Click the Add Images button > My Computer
Navigate to your Google Drive File Stream (H:) folder where these should be saved.
Press the CTRL Button and click on each one. Then click Open

Step 8
When you are satisfied with your collage Export your collage to your Google Drive File Stream (H:) as...
Your Last name_Picmonkey_Collage
Your Last name_Picmonkey_Collage

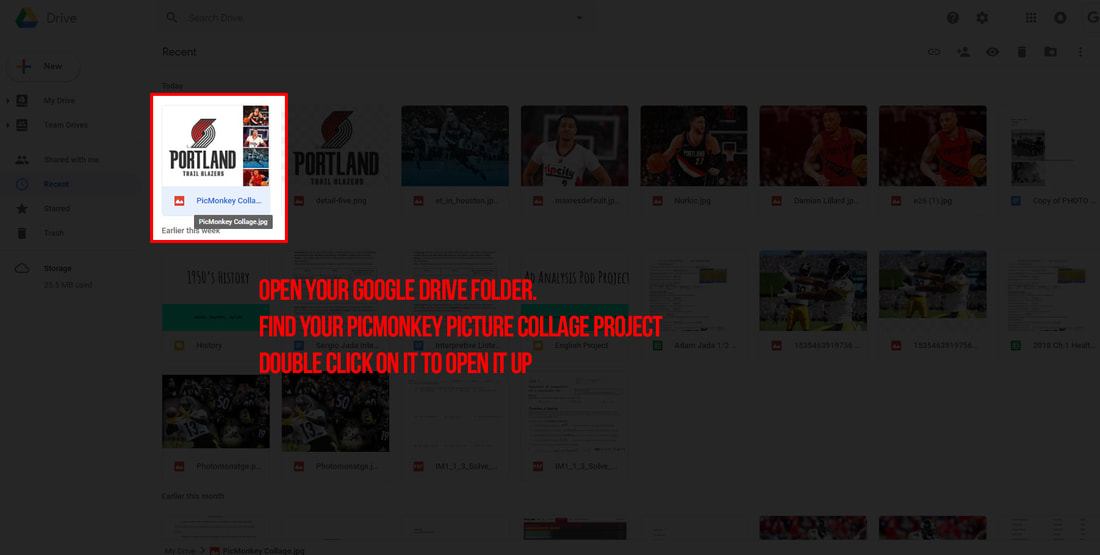
Step 9
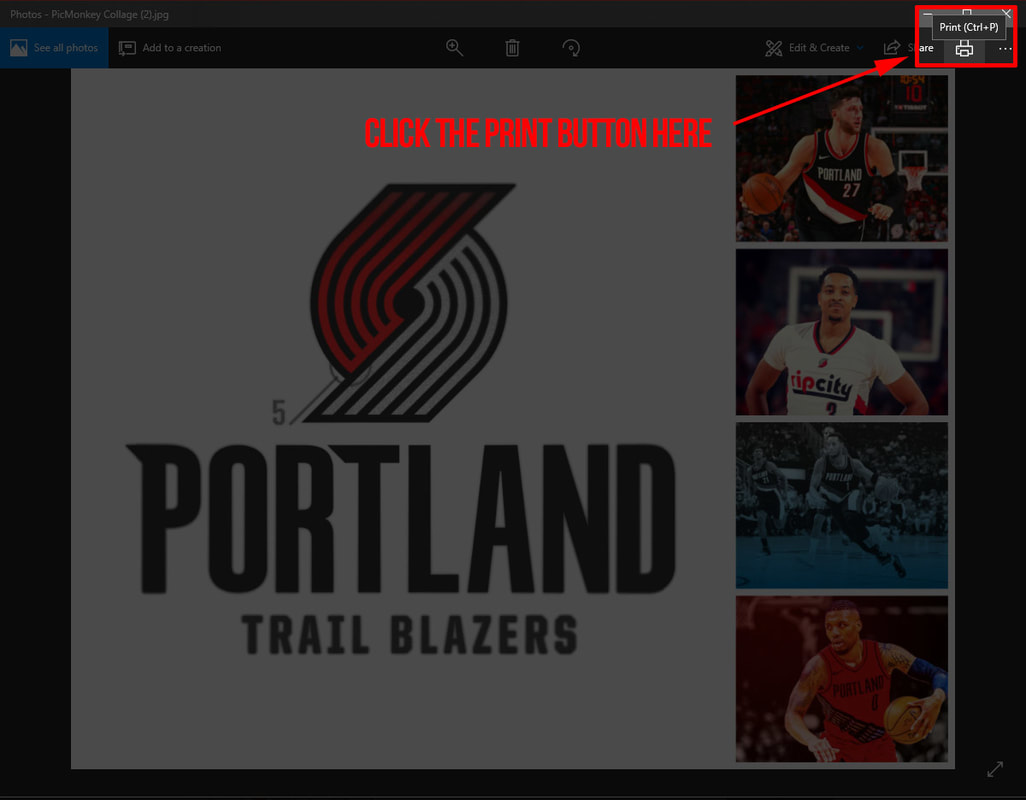
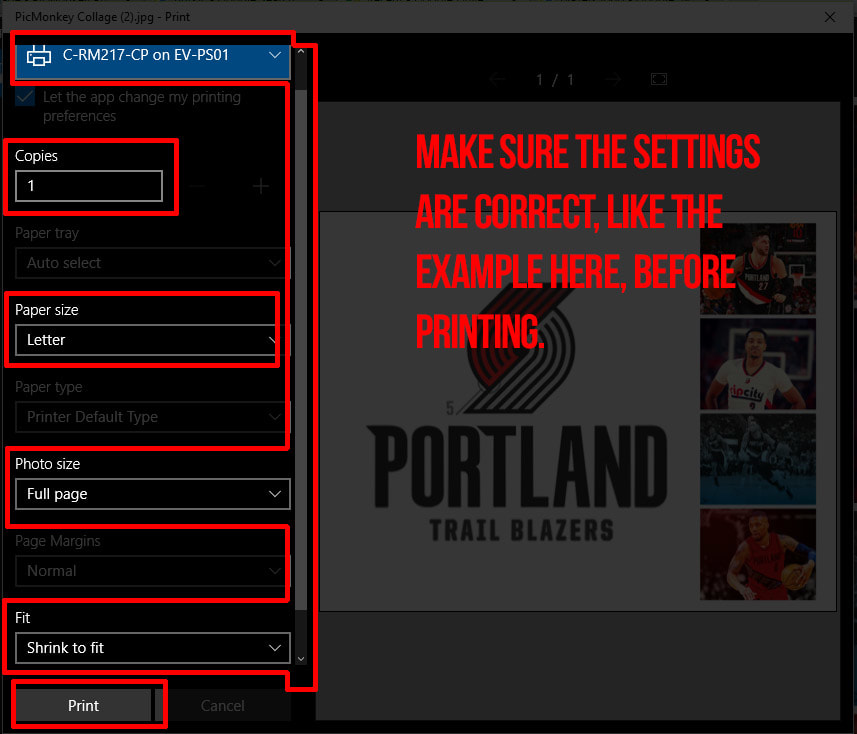
Print your completed Picmonkey Collage
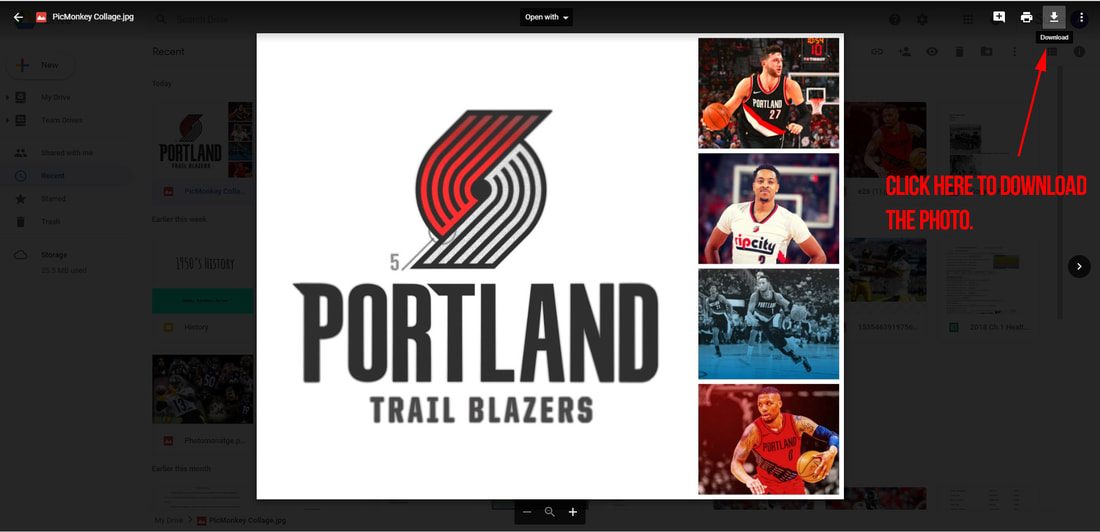
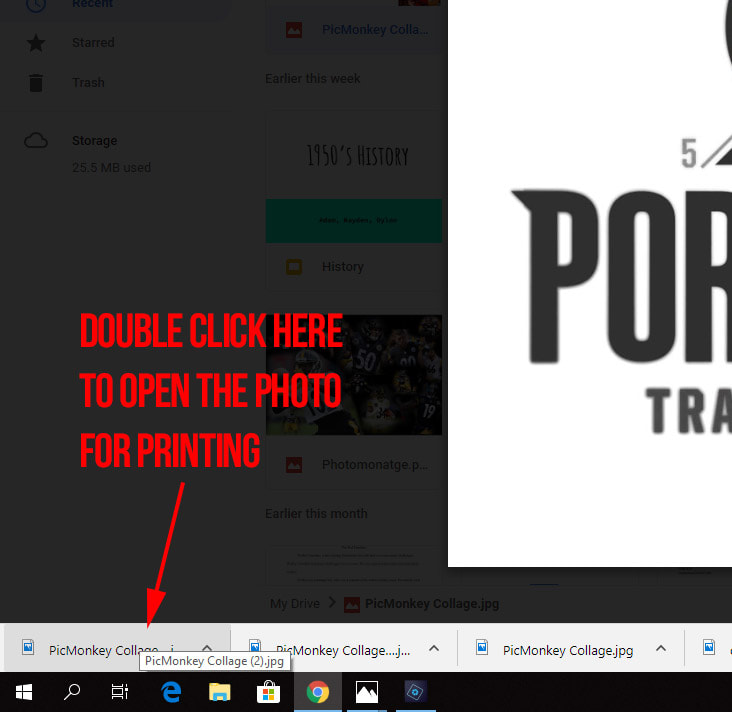
Open this file (located in your Google Drive File Stream (H:))
Print this to the color Printer - C-RM217-CP
Print your name on the back of the print and turn into the correct class basket for grading.
Print this to the color Printer - C-RM217-CP
Print your name on the back of the print and turn into the correct class basket for grading.